Sunday 21 April 2013

Adobe Flash - Next Page Button


Adobe Flash – Next Page Button

Open Adobe Flash and choose Action Script 2.0
In your stage draw an arrow key or any arrow that describes to view to next page or preview.
Like this:

So what I used here is line tool (N) and fills it with paint bucket (K) color red.
Lets then press right click on our arrow and select convert to symbol.
Name: next
Type: button
Like this:


Use rectangle tool (R).
Go to its properties then change stroke color with black and fill color with light orange.
Like this:


With our rectangle tool on use, draw a rectangle that would fit the stage you have.
Use selection tool (V) and move the arrow button right down on the stage.
Like this:


Use text tool then create any kind of message just above the arrow button.
Example:


Select your arrow button with selection tool (V) then right click and select action.
For our button to work we need to apply some coding in our arrow button.
Copy this code and paste it on your action script:

on(press){
gotoAndStop(2);
}

Let me explaine the coding its simple.
Here you have on(press{gotoandStop(2);}
The press with simply speaks for its action then go to and stop then you notice a closing parenthesis and the number.
The number is the number of your playhead in your timeline.
Let just say that starting from your 1st playhead going to your 6th playhead when you declared gotoandstop(6) the moment you press the next button it will automatically go and stop to that playhead.


In your timeline layer 1 we need to insert a keyframe in our 2nd playhead or simply just prses F6 for shortcut.
After inserting a keyframe you should be in your 2nd playhead by now and have the same thing as you have in your 1st playhead.
Now, I want you to change the text message and change the pointing direction of your arrow button going left by using transforming tool (Q) just rotate it.
Move the arrow button to your left side.
Like this:


Right click on our new arrow button then select action and change the number in your coding gotoandStop(1).
Like this:


Now try to see your progress by hitting Ctrl+Enter.

As you can see the whole thing is not finish yet cause the animation would only loop from the 1st playhead to the 2nd.
To fix it, we need to add some few codes on your keyframe.
Right on your 1st playhead keyframe then select action and copy this code:


In your 2nd playhead you need to have the same code as your 1st playhead.
After in your timeline layer 1 your 1st and 2nd playhead keyframe should have the same look as this:


Hold Ctrl and press Enter,
After you should be at your 1st playhead go ahead and press your arrow button if it works then after you press the button you should be at the next playhead.
Again press the arrow button and see if you will go back to your 1st playhead.


Saturday 20 April 2013

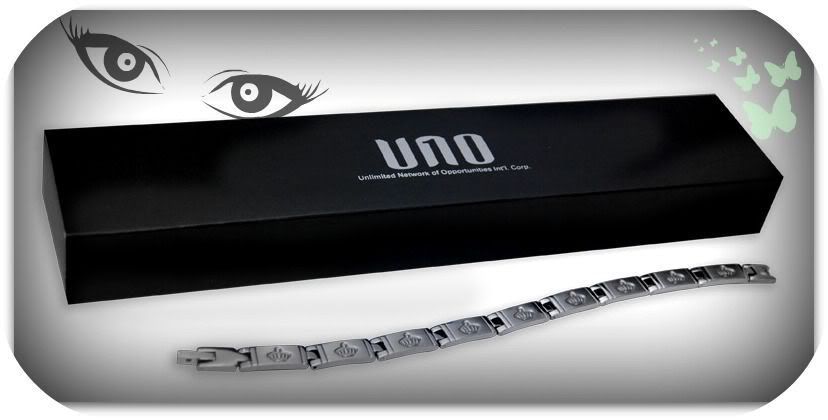
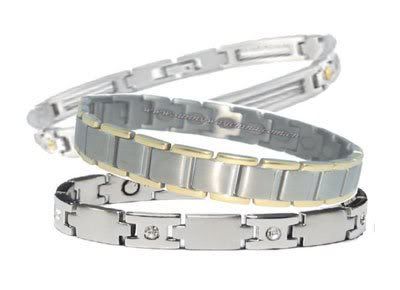
UNO Bioelectromagnetic Therapeutic Bracelet | Mangosteen and Goji berries Juice

health,fashion,beauty,atianci,bio magnetic bracelet

Magneto Therapy


Photobucket 
 
 
  • 6200Php (151.04$) Per bracelet)
  • Price per box and additional of 100Php for Freight (outside Cebu) – should be paid by buyer
  • Price per box and additional of 250Php for Freight (outside Phil.) – should be paid by buyer
  • Minimum of 2 bracelet per order (for outside Cebu and outside Phil.)
  • Unlimited Network of Opportunities International Corporation 
******************************************

Photobucket
Prime Juice | Mangosteen &Goji Berries


  • 25g x 24 Sachets
  • 35Php (.85$) Per sachet
  • 800Php per box (Cebu only)
  • Price per box and additional of 100Php for Freight (outside Cebu) – should be paid by buyer
  • Price per box and additional of 250Php for Freight (outside Phil.) – should be paid by buyer
  • Minimum of 3Boxes per order (for outside Cebu and outside Phil.)
  • Unlimited Network of Opportunities International Corporation


    Adobe Flash - Spinning Animation


                                        Adobe Flash - Spinning Animation

    • ·        open your adobe flash and select action script 2.0

    ·        The idea of this spinning animation it's something to animate that relates to spinning like wheels, boomerang, electric fan and etc.
    • ·        We need to draw some spinning object in our workspace. I choose to draw a simple one like boomerang.
    • ·        Use the line tool to draw the boomerang (N) for shortcut.

    Simple way to draw the boomerang is like drawing the mouth of pacman when it's open.
      You can add a paint bucket color if you want to fill its color (R) for shortcut.
    Like this:
    • Right click on the boomerang and select convert to symbol

    Name: boomerang
    Type: movie clip
    • Double click the object boomerang and you will see a different workspace for the boomerang
    • Use free transforming tool (q) shortcut. F
    • Insert a keyframe (f6) in your 2nd playhead
    • Rotate the boomerang going right by little.
    Like this:
    Our goal is to rotate the boomerang until it goes back to the original position.
    For the 3rd, 4th, 5th, 6th, 7th, 8th, 9th and 10th playhead insert all with keyframes and rotate the boomerang little by little in each keyframe until the boomerang reach to its original position.
    Go back to our main workspace.
    Press this arrow:

    Insert keyframe in the 30th playhead in our timeline layer 1
    Right click on the 30th playhead and select insert keyframe or simply press f6 for shortcut.
    Right click on your layer 1 and select add classic motion guide.

    Next, with our classic motion guide layer on our timeline…
    Create a blank keyframe in the 30th playhead (f5) for shortcut.
    Like this:

    Let’s go back to our layer 1 where we created our boomerang.
    In our 5th, 10th, 15th, 20th and 25th playhead insert each with keyframe.
    Like this:


    Go back to motion guide layer and select your first playhead and draw a line with line tool.
    This line will show as a guide for the boomerang
    Like this:

    Now, back to layer 1 and select your first playhead
    Use your selection tool (v) for shortcut
    Move the boomerang to this designated place and so for the 5th, 10th, 15th, 20th, 25th and 30th.
    Like this:


    Last part,
    Between 1st playhead until the 5th, 5th to 10th, 10th to 15th, 15th to 20th, 20th to 25th and 25th to 30th press right click and select create classic teen.
    After putting all classic tween in all frames you should be able to have the same thing as this:


    Hold Ctrl and press Enter to see your progress


    PSY - GENTLEMAN (lyrics and english translation)


    Once again, Psy of the famous Gangnam Style now hits on top the billboard with another KPOP single.
    GENTLEMAN
    This new head-poppin' song gained a billion Youtube views in just 4 days after its released on April 12, 2013. 
    Today, April 20, 2013, is still the 6th day of this new hit and yet its views is rising from 175,582,602.

    Alagamun-lan, weh, wakun, heya, hanun, gon
    I don’t know if you know why it needs to be hot
    Alagamun-lan, weh, makun, heya, hanun, gon
    (I don’t know if you know why it needs to be clean)
    Alagamun-lan, ari, gari, hanon, kari, he
    I don’t know if you know, it’ll be a problem if you’re confused
    Alagamun-lan, we like, we we we like party, hey
    I don’t know if you know but we like, we we we like to party

    Ichiba, varriya, is hara moru, mashi sondori, yama, varriya
    Hey there If I’m going to introduce myself
    Yougun, pegi, tur, equa, machen, varriya
    I’m a cool guy with courage, spirit and craziness
    Noga, onku, pega, haga, kunge, nande, varriya
    What you wanna hear, what you wanna do is me
    Damn girl! You're so freakin sexy
    Damn! Girl! You so freakin sexy!

    *I-I-I-I I'm a, I-I-I-I I'm a I-I-I-I I'm a, mother father gentleman
    * Ah Ah Ah Ah I’m a… Ah Ah Ah Ah I’m a… Ah Ah Ah Ah I’m a mother father gentleman

    **I'm a, I I'm a I'm a, mother father gentleman
    ** I’m a Ah I’m a I’m a mother father gentleman
    I'm a, I I'm a I'm a, mother father gentleman
    I’m a Ah I’m a I’m a mother father gentleman

    Alagamun-lan, weh, mikuneya, hana, gon
    I don’t know if you know why it needs to be smooth
    Alagamun-lan. weh, sikuneya, hana, gon
    I don’t know if you know why it needs to be sexy
    Alagamun-lan, pali, pali, wasa, nelly, neh
    I don’t know if you know darling, hurry and come be crazy
    Alagamun-lan, nali, nali, nasa, pali, hee
    I don’t know if you know, it’s crazy, crazy, hurry up

    Ichiba, varaniya, nori, moli, holy, daddy, chunga, ri
    Hey there Your head, waist, legs, calves
    Varriya, good feeling, feeling good, brutake
    Good! Feeling feeling? Good! It’s soft
    Varriya, gachu, gunya, sorinage, sorinage
    I’ll make you gasp and I’ll make you scream
    Varriya, damn girl! I'm a party mafia
    Damn! Girl! I’m a party mafia!

    * Repeat
    ** Repeat

    Gonna make you sweat.
    Gonna make you wet
    You know who I am
    Wet PSY

    I-I-I-I-I-I-I-I I'am a mother father gentleman

    **I'm a, I I'm a I'm a, mother father gentleman

    **I'm a, I I'm a I'm a, mother father gentleman


    Friday 19 April 2013

    Adobe Flash - Lightning Effect


    Adobe Flash – Lightning Effect

    • Open adobe flash and select action script 2.0
    • Familiarize the workspace

    • Activate onion skin by clicking its icon
    • Select your rectangle tool (R).

    stroke color must be black and there should be no fill.
    Like this:


    • Draw a rectangle in your workspace that would fill the stage
    • make a zigzag line in the middle of the stage with line tool or (N) for shortcut.

    The line in the middle should be connected to the edges of the rectangle that you made.
    Like this:


    • Select the paint bucket tool (K) for shortcut.
    • Above the zigzag lin, fill it with color blue.

    It represents the night sky
    • Below the zigzag line, fill it with brown

    It represents the ground
    Like this:


    In our timeline layer 1
    • Right click on the 70th playhead then select insert keyframe (F6)
    • Double click layer 1 then change its name to : Environment

    Like this:


    • Insert a new layer
    • Click on the first icon at the bottom left corner of your timeline
    • Change the name of layer 2 to: Lightning

    Like this:

    In our Lightning layer:
    • ·         Right click on the 35th playhead then select insert keyframe
    • ·         Select line tool (N)

    Change the stroke color to sky blue
    Like this:


    We should be at our 35th playhead or simply select its keyframe.
    Let us then create a lightning in our 35th playhead just above the stage or night sky.

    Like this:


    • Insert a new layer.
    • Double click the third layer and change its name to Light.


    Light layer
    • Right click on the 37th playhead and select insert blank keyframe
    • Right click on the 38th playhead and select insert blank keyframe

    Like this:
    In your stage
    • select the dark blue sky

    you should be able to see that the whole blue color is automatically selected.
    • Right click on the dark blue sky then select copy frame
    • Then we go back to our light layer
    • Right click on the 37th playhead/keyframe then select paste frame
    • Align then new blue sky with its original
    • In its properties: change the fill color to sky blue.

    When you done applying the following in your 37th playhead you should have the same stage as this:

    That should be all of it, hope you enjoyed this tutorial.
    Ctrl+Enter to see your progress.